Kessan's Landing Datacron Master
- #1 Schematic Aspirations Mission Guide
- #2.1 Advanced Hypercoolant Mission Guide
- #2.2 High-Grade Durasteel Mission Guide
- #2.3 Thermal Regulator Unit Mission Guide
- #3 Subjective Selection Mission Guide
- #4 Good Calibrations Mission Guide
- #5 There's Always a Backup Mission Guide
- #6 Test Plan Mission Guide
- Kessan's Landing Endurance Datacron
SWTOR Datacron Locations and Guides
- Alderaan Datacron Master
- Balmorra (Empire) Datacron Master
- Balmorra (Republic) Datacron Master
- Belsavis Datacron Master
- Corellia Datacron Master
- Coruscant Datacron Master
- Dromund Kaas Datacron Master
- Fleet Datacron Master
- Hoth Datacron Master
- Hutta Datacron Master
- Ilum Datacron Master
- Kessan's Landing Datacron Master
- Korriban Datacron Master
- Makeb Datacron Master
- Mek-Sha Datacron Master
- Nar Shaddaa (Empire) Datacron Master
- Nar Shaddaa (Republic) Datacron Master
- Onderon Datacron Master
- Ord Mantell Datacron Master
- Ossus Datacron Master
- Quesh Datacron Master
- Rishi Datacron Master
- Ruhnuk Datacron Master
- Taris (Empire) Datacron Master
- Taris (Republic) Datacron Master
- Tatooine Datacron Master
- Tython Datacron Master
- Voss Datacron Master
SWTOR There's Always a Backup Mission Guide

This guide will help you through the "There's Always a Backup" mission, the third part of a long series of quests that are required for the Kessan's Landing Datacron achievement in SWTOR.
Datacrons are collectables scattered around the galaxy in Star Wars: The Old Republic. Each Datacron contributes towards your Legacy's passive stats permanently. Furthermore, they also provide interesting Lore and Codex Entries about the Old Republic era.
This quest is a continuation from the Good Calibrations quest.
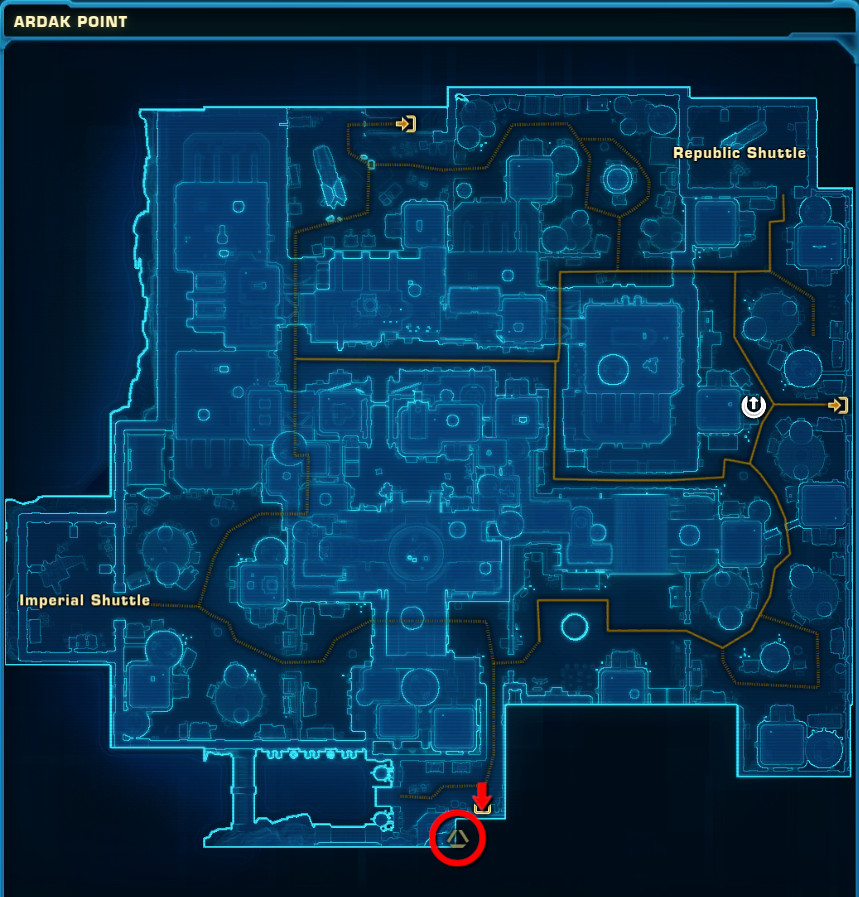
Pick up There's Always a Backup from the Geothermal Research Repository terminal inside the Runoff Control in the south of Ardak Point.


Initially click the temporary ability Attempt Data Recovery. Unfortunately, the terminal is too damaged and you need to return to the Security Mainframe.

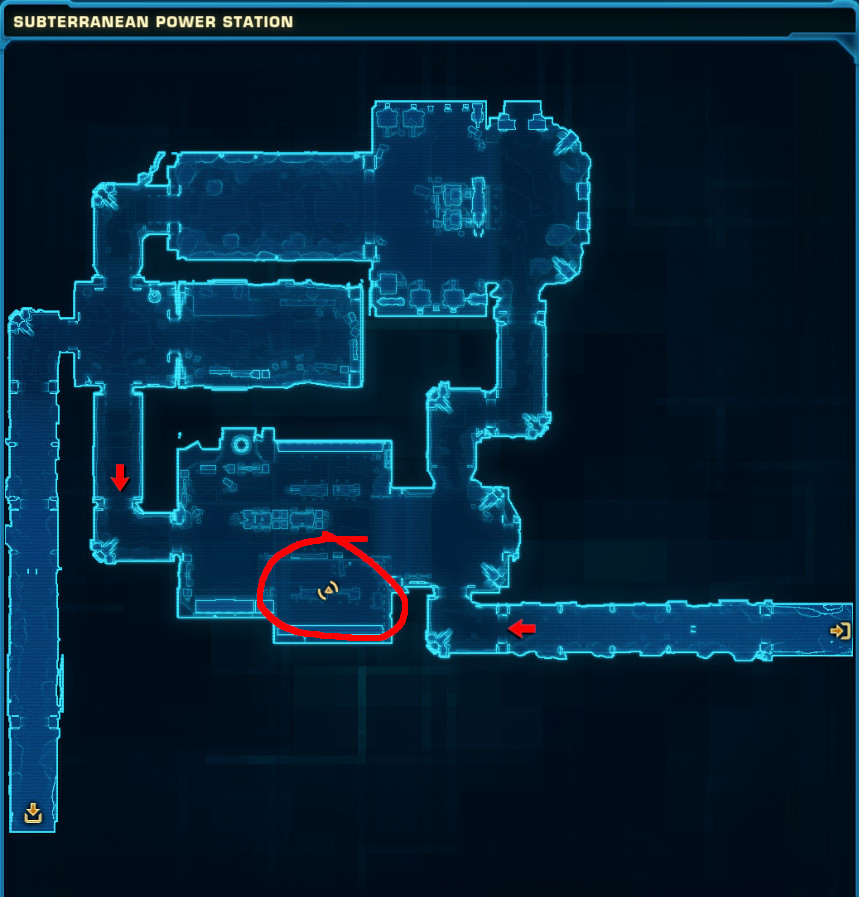
You will have to access the 3 Mainframe Databank terminals inside the Subterranean Power Station.


Once you have searched all three databanks, you can search for clues on where to go next in the three Personal Logs in your Missions Items tab in your inventory.
The Persolan Log: Career Goals gives you the hint "hypermatter manufacture", referring to the Daily Area of Black Hole on Corellia, while the Personal Log: IMPORTANT gives you clues to the code you will need there.
Travel to Black Hole on Corellia and find your way to Hypermatter Engineering Facility.
Note: Remember you can use your Activity Finder to quick travel to Black Hole.


In the most remote corner of the Hypermatter Engineering Facility, you will find a Backup Terminal. To slice this terminal, you have to click the coloured buttons in the correct order, which is Yellow - Green - Red - Purple. Confirm the sequence by clicking the fifth unmarked button. Next, you have to upload the data calibrations on the Data Analysis Unit to the right. Lastly, you have to download the backup research data on the Databank Repository to the left.
The clues from the Personal Log is:
"HELLO" = Yellow
"MEAN" = Green
"HEAD" = Red
"GLURPLE" = Purple


With your newly downloaded data secured, simply click the Fabrication Analysis Readout icon at your mission log. This is the end your mission and make the next one available - Test Plan.


